Monday, October 13, 2014

Local Trail - Grimes Point

Fallon is in one of the biggest and flattest valleys in the state, the Lahontan Valley.  People may not realize this but Nevada has the most mountain ranges of any state in the union.  I grew up in Reno, so I'm accustomed to having big mountains (the Sierra Nevadas) right out my doorstep, so to speak, so living in Fallon where it's flat and the mountains are a long ways off, has taken some getting used to. It's also not the greatest place to live if you like to hike and backpack.

However, as an archaeologist, this is one of the coolest places to be in the state.  Fallon is right at the heart of ancient Pleistocene Lake Lahontan, a lake so big that it covered most of Northern Nevada - waxing and waning for about 100,000 years.  The first people in Northern Nevada, estimated to have arrived around 12,000 years ago, would have seen the final remnants of this enormous lake in the form of lakelets and marshes.  Today, we still have a few bits and pieces of the lake left - Pyramid Lake, Honey Lake, and Walker Lake as well as large marshes including the Stillwater Marsh and Carson Lakes near Fallon.  The hills around Fallon bear witness to the ancient lake in the form of shorelines that are clearly visible as "steps" in the hillsides.

Archaeologically, this resulted in a rich history of human use in the valley.  Pretty much all of Nevada is some form of desert - "high desert" in Northern Nevada and "hot desert" in Southern Nevada.  Northern Nevada is also the heart of the Great Basin, a large physiographic region that is characterized by high elevation (3,500 amsl and above), cold winters, hot summers, and low precipitation.  It's called the Great Basin because this is where rivers come to die.  Early Euro-American settlers were amazed to see rivers simply disappearing into "sinks" with no visible body of water like a lake. The Lahontan Valley, where I live, is part of the Carson Sink, which is where the Carson River comes to die - although technically it feeds the Stillwater Marsh and Carson Lakes (which one depends on several hydrologic factors that I'm not going to get into and, not to mention, the Carson River has since been dammed and channelized into irrigation canals but that's a whole other story).

So anyway, the Lahontan Valley is unique in an area characterized by lack of water.  Large marshes and lakelets have occupied the valley since the final high stand of Lake Lahontan around 15,000 years ago.  Marshes are a rich source of resources including edible vegetation, waterfowl, fish, and freshwater mollusks.  Because of this, there has been a long history of human occupation in the Valley, something not seen elsewhere in Northern Nevada.  Most Great Basin prehistoric groups traveled seasonally following resources as they became available.  This was less true in the Lahontan Valley because of the year-round availability of resources.  The groups here might venture out to seek resources not available in the valley (obsidian, large game, pine nuts) but they seem to have mostly stayed put, especially starting in the Late Archaic, which was a period characterized by warmer temperatures and low precipitation.

OK, so why I am explaining all of this on a blog that is supposed to be mostly about hiking?  Grimes Point.  I have very few hiking opportunities in the Lahontan Valley due to its flatness.  I do go out on the Emigrant Trail quite often but it's flat and not very scenic.  It's great for walking long distances but that's about it.  Grimes Point is my other go-to hiking spot because it presents some nice topography for building hiking legs.  It is, however, one of the most important archaeological areas in the state.

Grimes Point is famous for three things - Hidden Cave, Spirit Cave, and the Grimes Point petroglyphs.  Hidden Cave is a "cache" cave that has aided archaeologists in establishing the Great Basin timeline.  It contains stratiphied deposits in dateable contexts that were the basis (along with Monitor Valley finds) for establishing the typology of our most diagnostic artifacts - projectile points.  Spirit Cave is where mummified human remains were found in the 1940s.  The remains have since been radiocarbon dated to 9,500 years ago, the oldest mummified human remains ever found in the United States.  Finally, the Grimes Point petroglyphs are one of the largest collections of their type in Nevada.  So yeah, a lot going on at Grimes Point.

There are several trails at Grimes Point but most of them are interpretive trails.  The Petroglyph Trail is closest to Highway 50 and there is a parking lot, pit toilets, and picnic tables available for visitors.  The Petroglyph Trail is about 0.5 miles long and winds among boulders with petroglyphs.  I recommend walking the trail in both directions because you'll see more if you do that.  The other interpretive trail is down a dirt road from the Grimes Point parking lot.  This trail winds around a hillside showcasing several cave sites including Hidden Cave.  This is a self guided tour and there are usually pamphlets available at the parking area.  There is also a pit toilet available.  These trails are a bit more rugged than the ones on the Petroglyph Trail, so not appropriate for the elderly or handicapped.  Hidden Cave itself is open for tours every other weekend and anyone interested can sign up at the Churchill County Museum on Maine Street in Fallon. Otherwise, Hidden Cave is locked up behind a stout iron door.  It was vandalized this year, the vandals going so far as to get through the door and spray paint over the archaeological deposits.  They still haven't found who did it.

OK, so the trail that I do is not technically an official trail at Grimes Point, although following the vandalization at Hidden Cave, the Bureau of Land Management conceded that the trail was being used and improved it in the hopes that people would at least stay on it and not be tempted to make new ones.  I start at the Petroglyph Trail parking lot and follow the trail up to the Overlook, which is an official trail.  The trail winds up to the Overlook and there is a nice bench and a couple interpretive signs that explain the history of the Lahontan Valley.  You can see Naval Air Station Fallon from here - that's where I work!

From the Overlook, the "unofficial official" trail goes east, climbing up a couple of good grades before reaching the top.  From the parking lot to the top, it's 1,000 ft of elevation gain in about a mile. Some of the climbs are real doozies!  After that, the trail turns north and follows undulating terrain until it drops down toward the Hidden Cave trails.  I follow the trail all the way down to the bottom where there are a couple of nice petroglyphs.  I think I even found a new one this weekend!  Or at least one I'd never seen before. It's amazing how the time of day and even the season can reveal new petroglyphs at the site.  I then turn around and go back the way I came.  It's about 5 miles round trip and takes me about 2 hours, maybe less if I'm hustling.  The trail has some nice views and it's very rocky, so it's a great place to work on your trail legs. Some of the grades are probably in the 30% range, so you'll be working to go up and come down.

Here are some photos of this weekend's trip with Jeff and the dogs:

Jeff and the dogs heading out on the Overlook Trail.  

Winding up the trail to the Overlook.

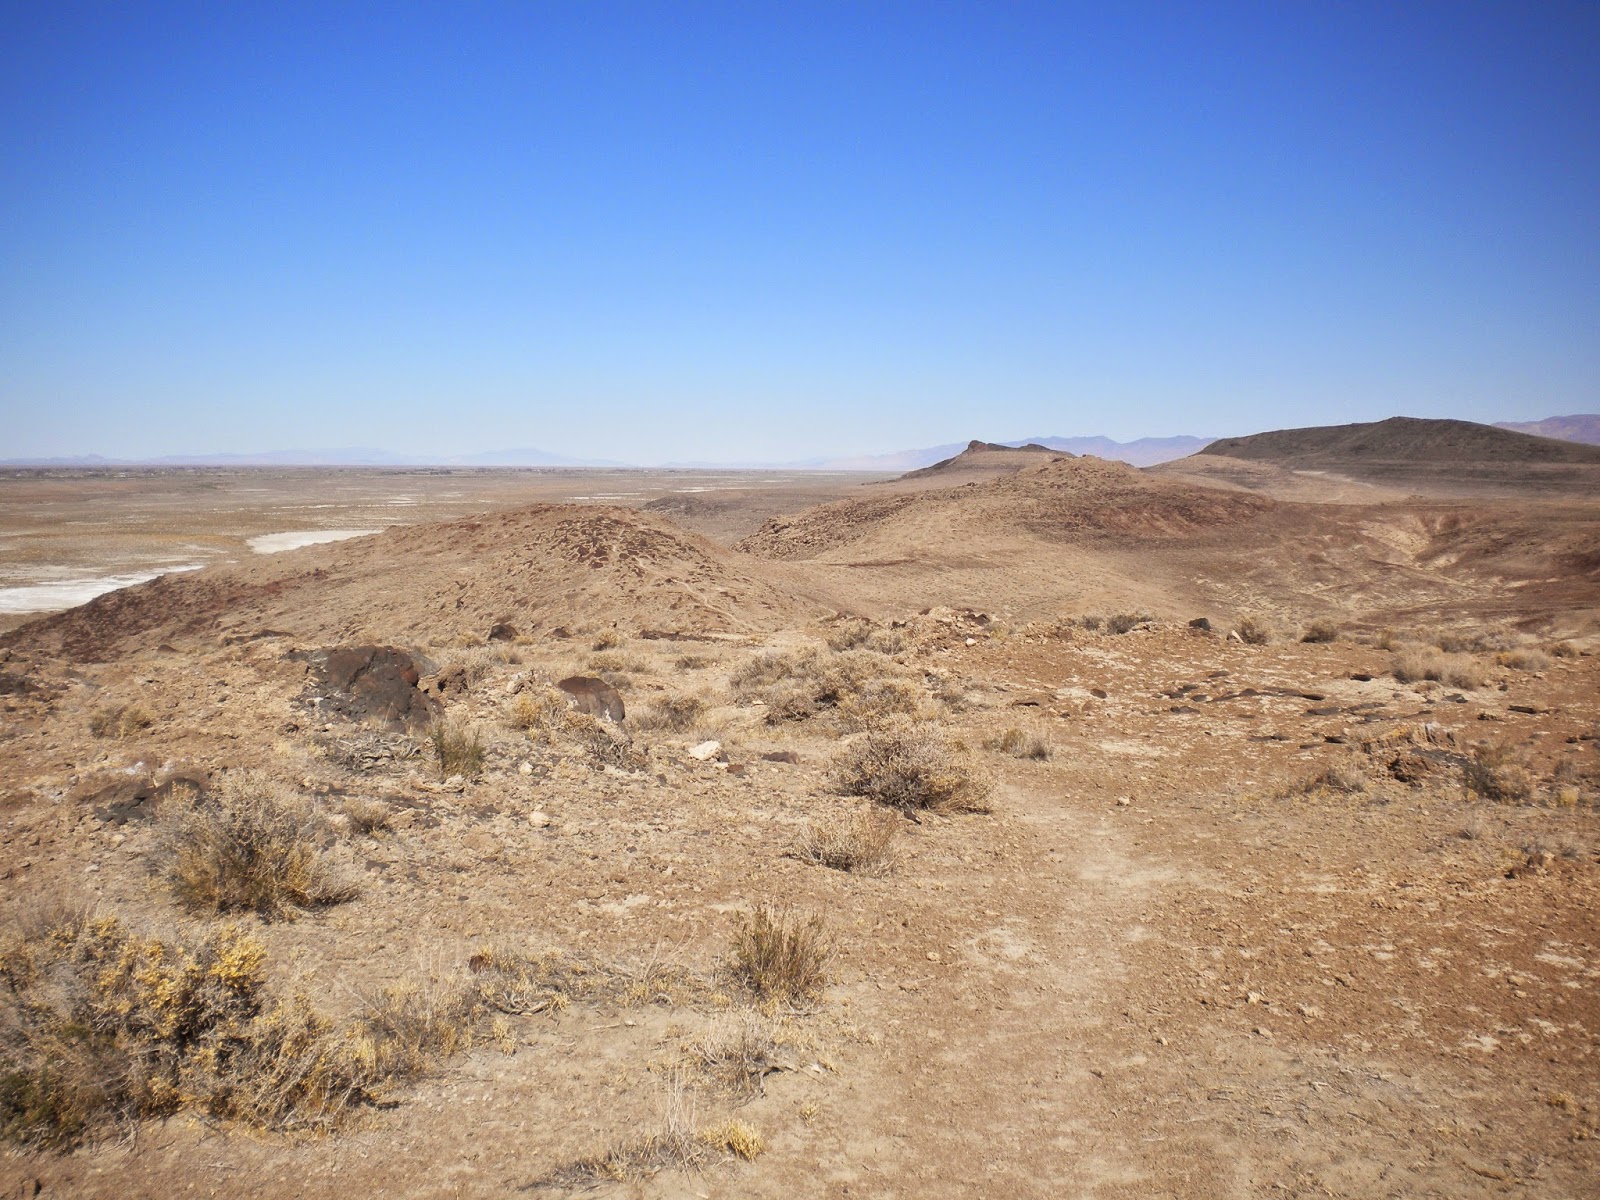
View north from the Overlook.  
You can clearly see the steps in the hillside from ancient lake shores. 

Heading east up the unofficial trail.

Heading north towards Hidden Cave.

Rocky terrain on the ridge top. 

Petroglyphs on the Hidden Cave side.

This curvilinear style is common at Grimes Point.

This is the new or "new to me" petroglyph I spotted.  
The "rake" design is common in this area.

Picnic Cave, directly across from Hidden Cave.

The trail heading back south. 

Jeff ended up carrying Roxie for a ways.  She was really tired from the heat.  
We decided her trail name is "Bagpipes."

Jeff carrying Roxie aka "Bagpipes" with Dexter aka "Mr. Underfoot" following close behind.

Saturday, October 11, 2014

My Day Pack - Outdoor Products Skyline 8.0

My last post made me think that I need to write a quick gear review of my day pack.  I love my day pack.  I love that it was cheap yet it's been amazingly durable.  I love that it fits great and carries a day's worth of gear effortlessly and feels great on my back.  I love that it thumbs its nose at more expensive brand name packs.  Sometimes you stumble on a cheap-o product that works great and keeps on chugging - this is one of the few items I've bought that has endeared me to it thoroughly in that regard.  You get what you pay for but sometimes you get more than what you paid for.

Outdoor Products Skyline 8.0

Never heard of Outdoor Products?  Think maybe that's a type-o and I meant Outdoor Research?  Well, no, it's not a brand name and it's not a brand that many self respecting, "serious" hikers would consider.  Wal-Mart sells Outdoor Products gear.  As does Big 5 (home of not-quite-household name gear but enough big names to make you think that the off brands are major brands).

The Skyline is a frameless bag with a big (for its size) main compartment, a long narrow front compartment (perfect for maps), two water bottle pockets, two hip belt pockets, and a large hydration sleeve. It also has a side zipper hidden by the left side water bottle holder that you can use to access the main compartment to retrieve small items without going through the top.  It's made of tough ripstop fabric that is lined with waterproofing.  Neither of my backpacking bags have this level of waterproofing.  One of my favorite features is the clip on the left shoulder strap for the hydration tube.  None of my name brand backpacks have this. For fit, it has a pretty respectable hip belt, sternum strap, load lifters, and two side compression straps.  I've carried as much as 15 pounds in it and it supports that kind of load admirably.  I'd imagine you could carry about 20 pounds comfortably with it.  Anything above that and the frameless nature of the bag would be apparent - but who carries that much in a day pack anyway?  I should also say that it's not technically a "frameless" bag -  it does have a single aluminum stay that keeps it from sagging or crumpling.

Even though it does have a lot of nice features for the price, it has many strange features - what I like to call the "WTF??" features of the bag. Features that seem to be there because a "backpack engineer" at Outdoor Products saw some pictures of hiking backpacks and decided to throw some stuff on the bag that look good (I guess) but have no real use.  The #1 weird feature is the stretchy not-quite-net thingy on the top.  I can see no reasonable use for this feature.  If it was bigger and lower on the bag, you could maybe use it to stow rain gear but where it is, it makes no sense whatsoever.  My other favorite non-features are the two gear loops on the bottom of the pack.  What on earth are you going to secure with these things?  Trekking poles?  Maybe, I guess.  Ice axe? Um no.  Finally, are you wondering what the 8.0 in Skyline 8.0 means?  Yeah me too.  Liters?  Kilograms?  No idea.  I guess it just sounds cool. Outdoor Products has other bags with "8.0" in the name so maybe it's the 8th iteration of the backpack.

I've had the bag for about 5 years and it just keeps on trucking with absolutely zero wear.  Originally I bought it to carry my gear for work but it's slowly crept into being my go-to day hiking bag.  Even carrying as much as 15 pounds, I put it on and forget it's there.  The sleek design means my arms have full range of motion and it compresses down and stays put on my back.  I've worn it in some pretty serious rain and it hasn't leaked yet.  I keep waiting for the top zipper to fail but it hasn't.  The Skyline is still available but it's now all black, which I don't find as attractive as my blue and grey model. I'm sorely tempted to order one of Outdoor Products framed backpacking bags for overnight hikes.  The Outdoor Products Stargazer is only $60 at Wal-Mart.


What on earth is this supposed to do?

Gear loops.  Yeah right.

A Nice Little Hike on the Tahoe Rim Trail

Jeff and I took the dogs out for a little hike on the Tahoe Rim Trail last weekend.  The weather is perfect for hiking and the aspens are starting to turn.  We started at the trailhead on the south side of Spooner Summit.  It's a great place to start because of the big parking lot and pit toilet.  Plus the grade isn't too steep and the trail levels out after about 1.5 miles.

This was my inaugural trip wearing a hiking skirt and my new Dirty Girl gaiters and I'm super pleased with both.  I'll be wearing a hiking skirt from now on.  I like that skirts allow for a lot of freedom of movement and keep me feeling cool and comfortable.  As far as the Dirty Girls are concerned - I was a little skeptical that they'd be better than my REI scree gaiters.  But how can hundreds of PCT through hikers be wrong?  Well, they're awesome.  They're so light and comfortable, I forget I have them on - compared to the REI gaiters, which I was conscious of pretty much all the time mainly because of the velcro scratching on my leg constantly.

The day was lovely and the trees, sagebrush, and manzanita smelled wonderful owing to some recent rain and snow.  We hiked about 3 miles in and enjoyed some nice views of the lake before turning back.  Even though it was a Saturday, we only saw a handful of other hikers.  I love getting onto the Tahoe Rim Trail and I'm going to try to get up to Lake Tahoe at least once a week until the snow prohibits any more hikes. I just wish it didn't require a 1.5 hour drive to get there from Fallon.

Me and Jeff.

Me sporting my Marmot Riley skirt and Dirty Girls.  My day pack is a cheap-o Outdoor Products "Skyline 8.0" pack that I paid $25 for at Big 5.  They sell them at Wal Mart too, if that tells you anything.  I love it.  Comfy and plenty roomy for a 3L hydration bag, extra clothes, and snacks. It even has two hip belt pockets.  I've abused the crap out of it and it keeps going. It even withstood a 6 hour downpour on the Oregon Coast without leaking.

Jeff as the intrepid explorer.

Early season snow on the east side of the lake.

Golden aspens way off in the distance.

My new Dirty Girls and trusty Salomons.

Little pine bough looks like a peace sign.

Canine hiking companions.  
Dexter (Australian Kelpie) and Roxie (American Pit Bull Terrier)


Homemade hiking skirt

I've recently been enjoying a hiking skirt that I got on sale from Sierra Trading Post.  It's the Marmot Riley skirt and it totally rocks!  Very lightweight with good coverage.  Unfortunately, I can't find any more Riley skirts online that aren't full price and they retail for $65 - ouch!  I got mine on sale for about $25 with a coupon from STP.

So to save a bit of money and to get precisely the sort of skirt I want, I decided to make my own hiking skirt.  While hiking the PCT in Oregon this summer, my waist got smaller and smaller, making my clothes fit worse and worse as time went on.  So I decided to design my skirt so that it could adapt to a shrinking physique.  I decided to go with a wrap around skirt because you can adjust it as needed to get the right fit.

Before beginning, I had the barest of ideas - mainly that I would make the waist closure with velcro so that I can wrap the skirt as tight or as loose as I'd like. Most wrap around skirts use a tie closure, which would be less adaptable than I had in mind.  I then went online and Googled how to make a wrap around skirt.  The formula that I found was pretty easy and ideal for what I had in mind.  The easiest way to make a skirt is to make a tube with some sort of waistband.  The problem with this is that the profiles of the skirt will be straight sided, which is not very flattering and could inhibit movement.  The formula I found makes for a slightly more fitted, A-line profile, which was much closer to what I had in mind.

Basically, the skirt is made from three trapezoidal panels that are sewn together and hemmed. The measurements below don't account for seam allowances, so remember to add for that.  This is how you do it (measurements in inches):

1) Skirt top (waist) - measure your waist and multiply by 50%:    30(1.5) = 45
2) Skirt bottom - take the result of Step 1 and multiply times 30% :   45 (1.3) =  58.5
3) Length - whatever length you want just remember to account for seam allowances and hemming.
4) Make a newspaper pattern using the above measurements.  The easiest way to make the pattern is to halve the waist and bottom measurements, fold a piece of newspaper in half and measure out from the fold.  That way your only cutting the edges once and you will make a pattern that is exactly identical on all sides.


5) Pick fabric for the skirt.  I wanted a lightweight synthetic for my skirt.  I looked through the polyester section of the fabric store and found exactly what I was looking for but unfortunately (or not, I kinda like it) the fabric I had in mind was only available in camouflage colors.  But camo is available in a wide variety of colors these days and I found a color and pattern I liked pretty well.  I purchased one yard of 60" wide fabric and some 1.5" velcro for the closure, all of which cost about $6.50.  I have a lot of thread at home, so I didn't need to add that to my expenses.  There was a small problem with only buying one yard but I'll get to that.  In the end, it turned out to be the perfect amount of fabric.

6) Begin cutting the fabric.  Technically, if you do this right, you will want three full panels cut to the above pattern.  I kinda screwed up by buying only one yard of fabric so I ended up cutting two full panels and two half panels - with the square of fabric I bought, that was the only way to get all of the pieces cut.  There are two minor problems with the way I cut my pieces:  1) you have to sew one extra seam because of the two half panels and 2) the fabric pattern for the two half panels won't run in the same direction as the rest of the skirt.  In the end, I don't mind the way it looks at all.  If you use a solid, obviously this won't be a problem. You also won't have this problem if you buy a longer length of fabric - say 1.5 yards instead of the 1 yard I bought.  BUT, I used the single yard thoroughly and there was very little wastage with enough fabric left over to add a couple of side pockets if I want.

7) Sew the panels together.  You could just do a regular flat seam for this but I went all fancy and sewed a "flat felled seam," which I am not going to explain how to do but here's a video.  Needless to say, it's the double seam you typically see on the sides of blue jeans.  It's stronger than a normal seam and is ideal for outdoor wear.  It's also a pain in the neck to do with a regular sewing machine because if you don't get your stitches exactly parallel, it looks like crap. Mine look OK - more like do-do than crap. :)

8) Hem the bottom and waist.  Hoy!  This took forever because the hems and waists of wrap around skirts are half again as wide as a regular skirt.

9) Add velcro to the waist for securing the skirt.  I had to play around a bit with this to get the velcro positioned correctly.  I put the "soft" side of the velcro on the inside of the skirt so that that the "grabby" side wouldn't rub against my skin.  Now that I've finished the skirt, I would probably do it the other way around.  I sewed on a really long length of velcro so the skirt would have the adaptability I was looking for.  Currently, there is a 4" length of velcro that isn't covered up when I wrap the skirt around my waist.  The "grabby" velcro sticks to everything including my hiking shirt, which will damage my shirt.  If I put the "soft" side out, I won't have this problem. I also added a short length of velcro near the back of the skirt to secure the inside panel so it doesn't droop. More experimentation needed here, obviously.

10) Tada!  One homemade, lightweight, adaptable hiking skirt:

Notice how the pattern of the front panel is vertical instead of horizontal like the rest of the skirt.
This is the result of cutting two half panels.  I think it looks just fine. The other half panel is hidden.


I think it turned out OK.  I'm going to make another one but longer.  This one turned out a little too short for my tastes.  It's OK standing up but it rides up really high when I sit down.  The finished skirt weighs 7.5 oz.  It took me about 4 hours to make.  So for about $6.50 and 4 hours of my time, I have a perfectly useable hiking skirt.