Sunday, December 21, 2014

Practice Makes Perfect

For me, probably one of the best things about doing a "short" trail next summer, is that I will be able to experiment with some changes I'd like to make regarding gear, food, and, honestly myself.

Gear
I liked the gear I had with me on the PCT.  I had minor quibbles with some of it but, hey, nothing's perfect.  Gear is actually the one thing I got really, really right during my hike in Oregon.  But there's always room for improvement, right?  To start with, my stuff was way too heavy.  Fully loaded with water and food, my pack was sometimes as much as 42 pounds.  Oof.  My goal for the TRT next summer is to get my max pack weight down to 38.  The easy way to do this is to shed extraneous items.  I didn't have many but they included camp shoes and a book. Those two items alone drop my pack weight by nearly 1.5 pounds.

The other way to dump weight is to use stuff that is lighter than my old stuff.  As much as I love my old North Face backpack, I'm retiring it in favor of my Granite Gear Nimbus Trace backpack.  The GG pack weighs nearly 2 pounds less than the NF bag.  It's also smaller and has a lower weight capacity, so I'll be forced to take less stuff.  I've also invested in a lighter down sleeping bag.  My old bag was rated at 15 degrees - far too warm for summer hiking. My new bag is rated at 25 degrees and weighs 1 pound less than my old one.

So there, a few minor changes in my gear and I've dropped 4.5 pounds from my gear weight!  However . . .  I'm also going to experiment with a new tent that is a few ounces heavier than my old tent (but not single walled, thank heaven) and I will probably be carrying a bear box, which is considerably heavier than my Ursak.  I've also decided to go back to using an air mattress because the Z Lite just isn't working for me.  And, because I like my comfort, I'm going to add a Z Seat so I have something to sit on for breaks.  But those two additions only increase my pack weight by 4 oz.  But still, it's more weight.  Sigh.  Obviously I'll need to do more thinking about gear weight but I figure I'm still saving about 2.5 pounds in weight with the changes I've made.  I'm considering going stoveless to save even more weight but the jury's out on that one (see next topic).

Food
Food is something I got really, really wrong on the PCT.  When I was planning for the trip, I focused too much on calories and not enough on nutrition.  I indulged in all the tasty junk food I love but failed to think about how empty those calories were.  The whole trip I hated just about everything I brought to eat. So next summer I intend to bring more whole foods like jerky, tuna, sausage, tortillas, cheese, dried fruit, and nuts.  The one thing that surprised me on the PCT was how I could happily eat a Clif bar every single day.  I thought for sure I'd get sick of Clif bars but I never did.  Bonus that they're actually full of good stuff.  I also really liked my raisin bran and dried milk breakfasts, so I'll definitely be bringing that again.

I've also considered going stoveless.  On the PCT, I didn't use my stove nearly as much as I thought I would.  At the end of the day, all I wanted to do was unwrap a Clif bar and shove it in my face.  I had little desire to dig out my stove and wait for something to cook.  Next year, for the TRT, I especially don't want to bring any food that requires a lot of effort to make.  If I bring a stove, it will be used to rehydrate or warm up food - and that is it.

I'll also be bringing supplements, especially electrolytes.  On the PCT, my body just ached constantly from the lack of nutrients and electrolytes and I am SO not going through that again.

Most of this junk is not coming with me again.

Me
I actually worked really hard on my improving my physical state before attempting Oregon last year. I lost about 20 pounds and walked 30-40 miles a week for months before going.  But I could have done better.  About 8 weeks before my trip, I got stressed out and resorted to bad behaviors to deal with it - eating too much and not exercising enough. I need to not do that this time.  My weight really held me back on the trail.  Never mind my pack weight - my personal weight was way too high and I paid the price in sore feet, aching muscles, and a bad attitude.  This year, I vow to do better.

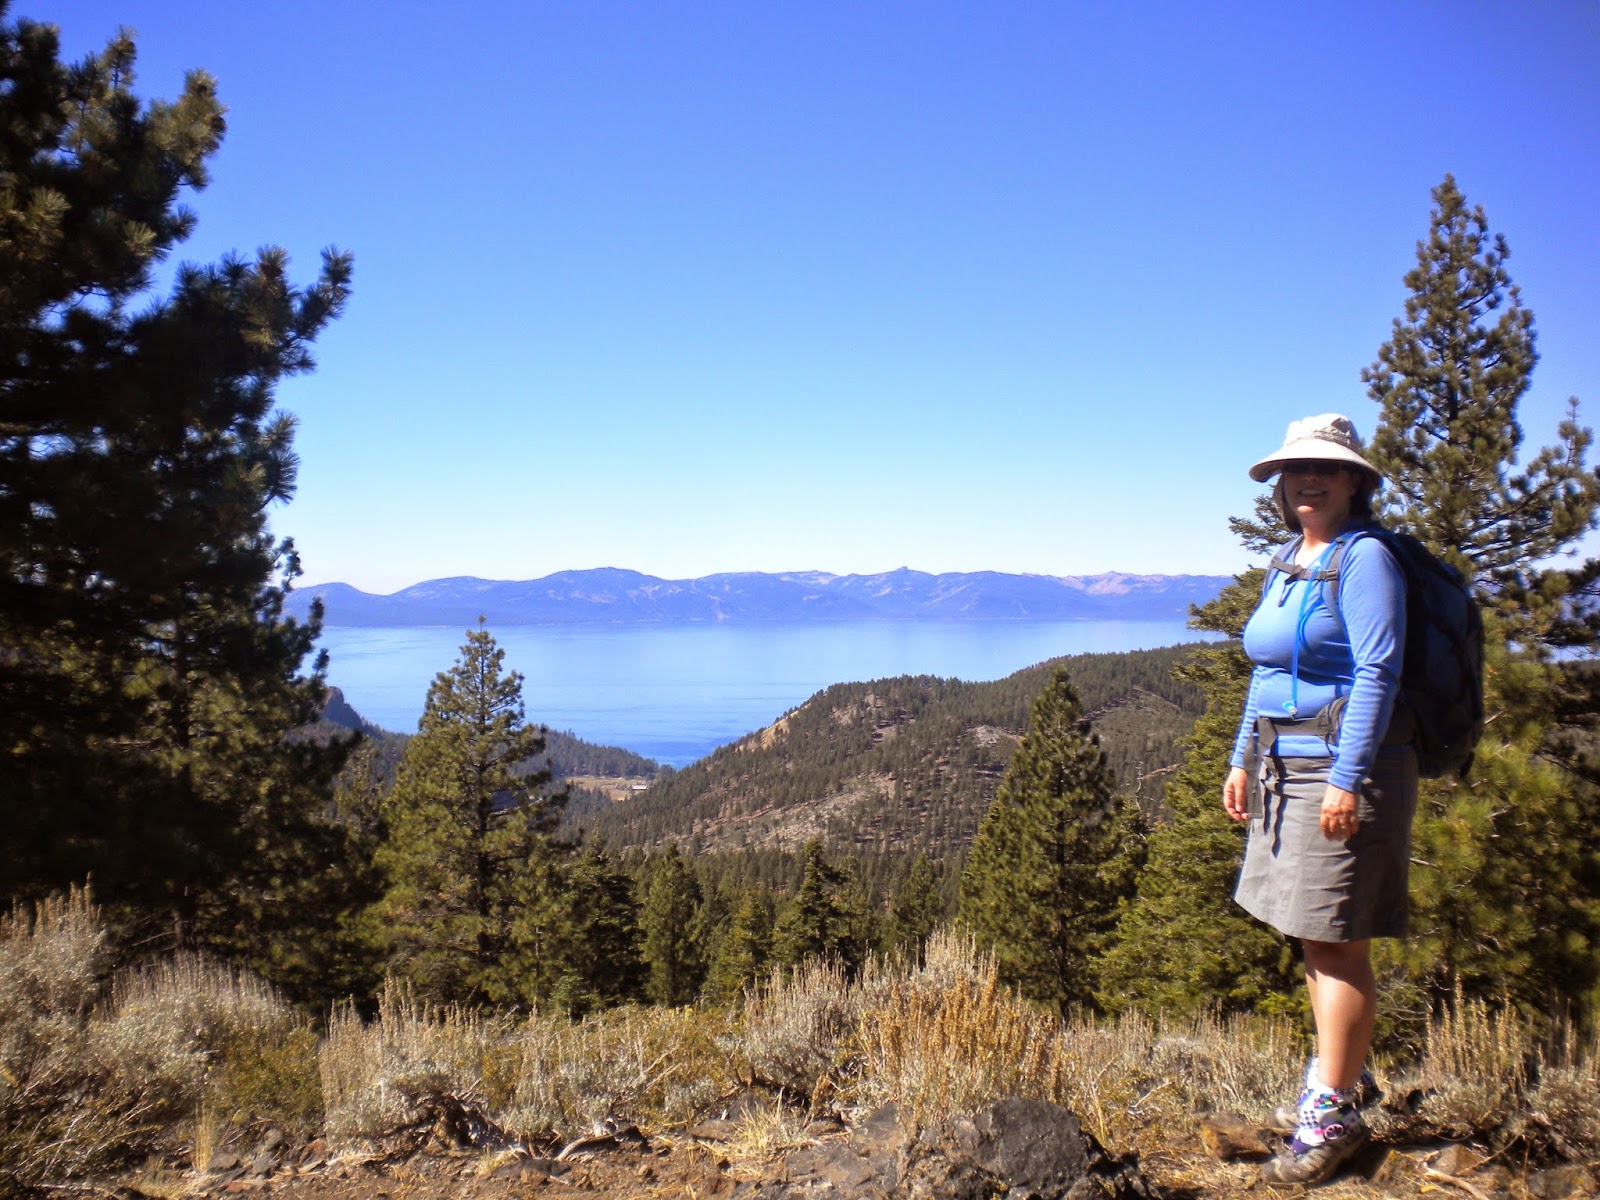
I also want to use my TRT hike to work on my attitude.  Prior to hiking the PCT, I read too many blogs written by 20 year olds who talk about nothing but the miles they were doing every day and how fast they were walking.  I got way too caught up in proving that I could walk a lot of miles day after day.  So my days on the trail were a constant rush to get the miles in.  I rarely allowed myself to take a proper break because I was so concerned with getting down the trail.  But in hindsight, I could have done the same miles in a more leisurely manner - if you walk all day, you're pretty much guaranteed to do 16-18 miles.  You just will.  So next summer, I'm going to take longer breaks, eat more, drink more, and go at a pace that is comfortable for me.  More than anything, I'm going to practice patience with myself knowing that the miles will come no matter what.

My poor tired, mistreated dogs.  I'll be better to them next time.

My Next Big Adventure

If I had my druthers, I'd reattempt Oregon next summer.  Unfortunately, there's this little thing called reality that is getting in the way.  The reality that I have a really good job that I enjoy and worked hard to get.  The simple fact is, I won't be able to bank enough leave to take a month off from work next summer.  It was also incredibly generous of my employer to allow me to leave for four weeks and I don't want to push my luck by asking for a month off two years in a row.  I'm also taking a year to lick my financial wounds from a pretty expensive year - not just my trip to Oregon but all kinds of other things. This stuff is why you don't see many 40-year-olds on the PCT. We have all these gosh-darned responsibilities that keep us from doing the fun stuff we want to do. It sucks being a grown up.

So in the meantime, I'm pondering what to do with myself next summer.  I don't want to take a lot of time off for backpacking, so I can ensure that I have enough leave to do Oregon in 2016.  So, as the kids say, the obvious answer is obvious.  I'm going to do the Tahoe Rim Trail.  Lake Tahoe is only about an hour and a half from where I live.  It's also one of my favorite places on Earth
.  It's also not terribly long - only 165 miles, so I can do it in a leisurely week and a half.

Probably the best thing about doing the TRT is that it's my hood.  I grew up in Reno, so as a kid I was up at Tahoe at least once a week in the summer.  It's absolutely my favorite environment.  I love going up there when it's hot and dry and the pines and sagebrush smell so good with the combination of decomposed granite and pine needles crunching under foot.  I just love Tahoe in the summer time.

The TRT itself isn't ideal.  It's busy with hikers and mountain bikers - at times you feel more like you're in Disneyland than in the woods.  The mountain bikers especially make it less than ideal.  They chew up the trail and you're constantly stepping aside for them (even though they're supposed to yield to hikers).  But you know what?  Whatevs.  A big chunk of my hike will be in the middle of the week and I doubt I'll see much of anyone.

TRT here I come!  Meanwhile I have a long winter to get through.

Saturday, November 15, 2014

A Trip to the Oregon Coast

I've been going to Oregon a lot in the last couple of years.  Last year, I believe I went 8 different times.  Now that my parents are living on the coast, it's become my go-to spot for vacations (it always kind of was but now it's even more so).  Anyway, Jeff and I loaded up the dogs last week and headed to Oregon to stay in Yachats, our favorite getaway spot.

My initial plan for hiking on the coast was to hike from Washburne Campground to Haceta Head.  But months of lethargy since my backpacking trip in Oregon have resulted in my physical state being less than ideal, so I chickened out on this short (4.3 miles round trip) but hilly hike. But I did manage to do other little hikes.

As a kid living in Eugene, I went to the coast with my family at least once a month.  My grandmother's favorite spots were always Cape Perpetua and Haceta Head so I've been there many, many times but I always love going back.  Cape Perpetua is managed by the Forest Service and has a great visitor center and numerous hiking trails to enjoy.  Many of the trails meet up or follow the Oregon Coast Trail.  In fact, if I wanted I could hike from Yachats to Cape Perpetua and back.  It would be a long hilly hike but satisfying.  I really enjoy walking to places that I previously only ever drove to.  It's part of my desire to see things in a different way - lately I've been forcing myself to slow down and check things out more thoroughly and I'm enjoying it immensely.  It makes the "known" fresh and interesting again.

At Cape Perpetua, Jeff and I did the short hike out to the Giant Spruce.  It follows a stream, climbing gradually to the tree.  It was nice to be on a forested, duffy trail again.

Lovely little trail.  Built by the CCC in the 1930s, apparently.

I was fascinated by this trees growing out of a "nurse log."

This tree is growing out of a "nurse stump."

Jeff and dogs by the Giant Spruce - 40 feet in circumference. 

Wow.  Tall tree.

After Cape Perpetua, we went up to Haceta Head and walked the short trail up to the lighthouse - supposedly the most photographed lighthouse in the country.  I've been coming here forever but it's always a lovely sight.

Jeff loved the lighthouse symbol on this sign.

Nice view of the Haceta Head beach and assistant lightkeepers' duplex.

Lighthouse peeking out from the hill.

My kind of artsy photo of the lighthouse.

Other photos from our trip:

Stormy view from the north viewpoint at Sea Lion Caves.  That's Haceta Head in the distance.

The Alsea Bridge at Waldport. The historic bridge was demolished in the 1980s due to structural concerns but they kept the beautiful old lights and towers and incorporated them into the new bridge.  The light is solid glass that has solarized to a nice honey color (due to selenium in the glass).

Jeff checks out one of the towers at the end of the bridge.  As a historic preservation specialist, it makes me happy to see these old elements of the historic bridge preserved.

Mt. Shasta as we cruise south on I-5, heading home.


Sunday, November 2, 2014

Advice to New Backpackers - The "Do's"

Following up my last post that was a bit on the negative side, here is my list of "Do's" for new backpackers:

Think hard about what you're trying to do
     a. Take a good, hard, honest look at yourself and your situation.  How much experience do you have outdoors?  How fit are you?  What is your inspiration for trying backpacking?
     b. What is your Plan B if you can't do what you set out to do?
     c. Make a list of all the things you'll need and calculate the cost.  I thought I had almost everything I needed for long distance backpacking but in the end, the only things I already owned that went with me were my backpack, compass, and Swiss Army knife.
     d. Be realistic about what you can handle.  If you're just beginning, try a practice hike that is rated "easy" or "moderate."  You may be surprised that even these trails aren't as "easy" as they're supposed to be - especially when you're carrying a heavy backpack.

Train before going
     a.  If you're already an athlete and run marathons before breakfast, great.  Otherwise, get yourself into at least decent shape.
     b.  Walk.  And then walk some more.  And then go walking again.  Being on your feet and moving is the best way to train for long distance backpacking.  I logged about 500 miles in training walks before I went to Oregon.  It goes without saying but walk with your backpack on, gradually building up to 35 pounds.
     c.  If you've never been backpacking and you plan to do a big trip, do at least one 3 day practice trip before you go.
     d.  Load your backpack with stuff and get used to putting it on and taking it off.  There's a technique to it.  Be careful - I almost through out my back while practicing with a 35 pound pack.  When I'm by myself and don't have a handy rock or tree stump to help, I pull the pack up onto my knee by the straps, slide an arm through, and push it around onto my back.
     e.  Practice loading your backpack.  Play around with where you'll put stuff and how you'll stack things in the interior.  The rule of thumb is light stuff on the bottom (usually your sleeping bag), heavy stuff in the middle (usually your food supply), middling weight stuff on top (various ephemera - I always kept my water filtration stuff on top where it was easy to get to).  Maybe I'm obsessive but I spent hours and hours at home packing and repacking my backpack, trying to find the right balance.  If your backpack is off balance on the trail, you'll notice it and it won't be fun digging everything out and readjusting.

Study your route
    a.  Look at maps, read trail journals - whatever it takes but become familiar with where you're going.  Have at least a basic idea of how far apart water sources are or sections that could be strenuous or long.  If you're new to backpacking, planning is super important.  REI does trail basics classes, so if you don't know how to read a map or use a compass, you might consider taking one.
     b.  Carry maps and a compass.  For the PCT, the Halfmile maps are awesome.  They not only show the trail but resupply points, camp spots, and water sources along the trail.  Halfmile and Guthook have also developed smartphone apps for the trail, which a lot of people rely on entirely.  I had them as well but used my maps most of the time to spare my phone's battery.  I also encountered a bunch of hikers who had been caught in a downpour that ruined their electronics.  Paper maps won't break if you drop them and don't need batteries.  I kept mine in a Ziplock bag in case of rain.

Get to know your gear really well
     a. Trying on that new backpack at REI with (hopefully) 30 pounds of sandbags in it is one thing - carrying it "for reals" is something else entirely.  My husband bought an Osprey backpack that fit great in the store but then he ended up despising it on the trail.  Load up your backpack with your backpacking gear and take a walk - even if it's just around the block.  Walk up some stairs, walk downhill, walk uphill, step over things, bend over, etc.  Do everything you can to see how it will feel in a variety of situations.  This should point out pressure points or other problems.  Don't be afraid to take the backpack back to the store if it doesn't work out. A good fitting pack is probably the most important piece of gear you'll have.
     b. Set up your tent in the yard and get in it.  Take it down and put it in its stuff sack.  Is it a pain to set up and take down?  Imagine setting it up in the wind or in a tight spot or in a hurry - will it work in these conditions?
     c. Try a few different outfits in various conditions.  Prior to backpacking, I had logged hundreds (maybe 1000s) of miles hiking for my job.  I had always worn army surplus pants, cotton cowboy shirts, merino wool socks, and hiking boots.  My practice hikes clued me in that this was not a good backpacking outfit.  I don't know why.  Possibly because backpacking involves hours of virtually non stop walking on trails whereas my job requires cross country "bushwacking" where protective clothing is a must.  Anyway, my old clothes didn't cut it for backpacking, which was a big surprise.
     d. Use your stove at home before going on the trail.  Try making some of your backpacking food with it.  Is it a pain to use?  Is clean up an ordeal (imagine being without a sink or soap)?

Wear light hiking shoes or trail running shoes
     a. Before the PCT, I was a staunch hiking boot person.  I tried trail running shoes after reading about lots of other hikers who had switched to them exclusively.  They're right, running shoes are the way to go.  They're lighter than boots and are more flexible, so your feet will be less tired at the end of the day.  The flexibility also means that you'll get fewer blisters from them.  The ankle support that boots are supposed to give you is a misconception that has persisted for too many years.  A good, supportive running shoe will give you just as much support without the added bulk of a boot.
     b.  Try out different styles and brands.  Give trail running shoes a chance.  Because of their flexibility, they will actually make greater contact with the ground than a pair of hiking shoes with heavy Vibram soles.  The only benefit of the Vibram soles being that they will last longer but a pair of running shoes should last at least 500 miles.
     c.  Try out different types of socks.  I used to always wear Merino wool socks until this summer when I discovered they were giving me heat rash.  I switched to synthetic Thorlo socks and haven't had a problem with heat rash or blisters.
     d.  Wear gaiters with your low hiking shoes or running shoes.  They will keep out dirt and debris and anything you can do to keep clean is well worth it.  Dirty Girls are the preferred gaiter of PCT hikers and I love mine too.
     e.  Buy your shoes a minimum of 1/2 size bigger than normal.  Most people go up a full size to account for the splaying or your toes and how swollen your feet get from a day of walking.

Carry nutritious food
     a.  It's tempting to bring lots of high calorie snacks on the trail but there is no way you'll be able to carry enough food to replace what you've burned (unless you're only going overnight).  On my Oregon trip, I made the mistake of bringing too much junk food - high calorie but not very nutritious.  Bring as much unprocessed, whole foods as you can.  It will need to be dehydrated to save weight but you'll be much happier than if you'd brought processed junk.
     b.  Experiment with the food you'd like to bring.  I discovered that I disliked almost everything I brought.  Your cravings may surprise you.
     c.  Bring supplements and take them consistently. A good multivitamin, some form of magnesium, and an electrolyte drink powder are a must.  I brought Emergen-C and Gatorade powder and enjoyed them thoroughly but didn't bring vitamins or magnesium and paid the price in cramping muscles.

Take care of yourself
     a.  Keep yourself as clean as you're able.  Switch out your socks, rinse out your shirt, empty the dirt from your shoes.  Carry wet wipes and take a "bath" every night - especially your private areas. Staying clean isn't just a good morale booster, it will help you avoid chafe, blisters, and sores.
     b. Pay attention to how you're feeling and take care of problems immediately.
     c.  Give yourself a break.  You don't have to keep up with everyone else and if you need a zero day, take it.  The trail's not going anywhere.
     d.  At least once a day, take your shoes off and rub your feet.  Let your feet air out and change your socks.

Have fun!
     a.  Take lots of pictures.  You may never be here again and what you're doing is amazing!
     b.  Look up and appreciate small moments.
     c.  Learn more about yourself than you ever knew before.
     d.  Gain wisdom and confidence.
     e.  Keep a journal so you can read back over your experience.
     f.  Keep your sense of humor and know that "it can always be worse and nothing lasts forever."
     g.  Learn new and weird skills like how to poop perfectly into your "cathole."
     h.  Sleep on the ground.  Drink water from the earth.
     i.  See the stars!
     j.  Get weird looks from day hikers.
     k.  Come home excited about running water and refrigeration.
     l.  Learn how bad your BO can really get.
     m.  Realize that all you really need is 35 pounds of equipment, food, and water.

Aww, time off the trail in a crappy motel.  Heaven.


Advice to New Backpackers - The "Do Nots"

With the popularity of the book, Wild, by Cheryl Strayed and the upcoming movie based on the book, folks are predicting a large increase in the number of people attempting the Pacific Crest Trail next year.  The Pacific Crest Trail Association has even started a separate page and blog to "deal" with the presumed upcoming influx of new backpackers.  Lots of seasoned backpackers are shuddering at the thought of so many "newbies" on the trail.  Fears range from "too many people on the trail" (and all the damage that can cause, especially in regard to trash and waste) to "the number of emergencies will increase."  Personally, I think it's great that the book and movie are inspiring people to hit the trail.  We live in a beautiful country with lots of wilderness areas that should be explored and experienced.

For this post, I thought I would offer some advice for people looking to hit the trail (or any trail) next year.  This is meant to be general advice, not a how-to or a gear guide.  I'm going to start with "don'ts," which seems a bit negative but I think there are quite a few misconceptions about backpacking and being outdoors in general.

Don't overpack.  Whether you're planning an overnight hike or an entire thru hike, the less weight you carry, the better your experience will be.  There are many, many things that people think they need for a wilderness adventure but in the end won't use at all.
     a. Personal protection.  Leave the handguns and bear spray at home.  You won't need them and they weigh too much.  Unless you have those things at the ready on a holster, they'll be useless to you anyway.  I use a SPOT emergency transponder in case I get into trouble.  But it also has the added benefit of tracking my progress so my friends and family know where I am (very useful if people are meeting you at trailheads).
     b. Cooking accessories.  Keeping in mind that lighter is better, the maximum amount of cooking accessories you will need are a stove (and fuel), a bowl/cup with screw on or locking lid, and a spoon/fork combo.  If the point of your trip is to make a gourmet meal at your campsite, then you might want to bring more but backpackers don't need anything else than the items listed.  I use my cup/bowl for everything from eating to drinking.  To clean it, add some clean water, put the lid on, slosh it around a bit, then drink the water.  Water is precious and you'll be getting the last dregs of food this way.
     c. Books.  Dead weight.  If you're planning on doing long distances, you will never have the energy to read while on the trail.  Cheryl Strayed brought several books with her and found time to read them but this is definitely the exception.
     d. Lots of extra clothes.  Backpacking is stinky, dirty business and you'll be tempted to bring extra fresh clothes.  Bring precisely what you'll need and nothing more.  Gauge this based on the time of year, obviously.  For summer, socks and undies are the only extra clothes you'll need (aside from rain gear and warm layers).
     e. Camp shoes.  There is a lot of debate about camp shoes and I did carry them this year in Oregon but I would definitely leave them behind next time.  I used mine primarily to access muddy water sources where I needed to wade out a bit - but my feet got muddy anyway.  If you're bringing camp shoes because your feet really hurt at the end of the day, you should maybe rethink your footwear choice.

Don't listen to the hype and HYOH (Hike Your Own Hike)
     a. Decide for yourself what kind of gear works best for you.  There is a lot of information out there about gear but until you try something out for yourself, you won't truly know if it works for you.  For example, I bought a pair of Brooks Cascadia running shoes (the most popular PCT shoe) for the trail but they did not work for me.
     b. Unless you're an ultra marathoner or an avid backpacker, don't expect to make "the big miles" right away.  You'll read lots of trail journals and blogs that talk about 30 or 40 mile days.  This is not realistic for most people and don't expect to be doing those miles right from the start.  Train before you go to gauge how much you can handle in a day but also use the first 3-4 days on the trail to get acclimatized.  At first, try not to do more than 12-14 miles/day.  Starting out too hard too fast is a sure way to get hurt and demoralize yourself.
     c. Hikers tend to get poetic about the trail and they also tend to gloss over the not-so-great stuff.  Their journal entries make it sound like every day is the most amazing day ever.  This isn't exactly true or honest.  If you have the right attitude, you'll surely have a great time but also be aware that there will be days where you're just not into it.  Don't let the bad days dissuade you from your goal.

You don't have to hike the Pacific Crest Trail.
     a. There are lots of long distance backpacking trails in the U.S.  Try doing one close to home - it'll be cheaper and you will get to see your area from a totally new perspective.
     b. If you're new to backpacking, I highly recommend you try a backpacking trip of 3-4 days before you tackle long distance walking. This will give you a chance to figure out if it's something you really like - with the added benefit of giving your gear a thorough test.

Don't prove the seasoned hikers right.
     a. Follow the principals of Leave No Trace.  Pack out everything you pack in.  If you carried it in, you can carry it out.  Bury your poop deep and way off the trail and far from water sources.  Stay on the trail - DO NOT cut the trail to get down (or up) a slope.  Trail maintenance crews work hard to keep the trail nice and you'll be causing erosion problems if you cut the trail.
     b. Don't foul water sources with your dirty clothes or dishes (see above about my "swish and drink" method of cleaning).  If you have to rinse something out or want to wash off, go way down stream from anywhere people would gather drinking water.
     c. Be polite.  Say "hi" on the trail.  Be courteous.  Don't burden other people with your problems unless it's a real emergency.  Yield to horseback riders.  The best way to do this is to step to the side where the horse can see you - don't stand behind a tree where the horse might be surprised by you.  Mountain bikers are supposed to yield to hikers but in my experience they rarely do.  It's much easier for hikers to step aside for them.

Don't quit in the first 3 days
     a.  The first few days on the trail are the hardest.  Your body is getting used to what you're doing and there will be some aches and pains associated with this period.  You probably will also be surprised by how tired you are and by how bad you're "sucking wind."  That's totally normal.  Just keep going and it will get better.
     b. Don't compare yourself to others.  There's always another faster hiker on the trail or someone who seems like they can power up the hills.  Hike Your Own Hike and don't worry about that stuff.

Next: The "Do's"  Yay!!

Me and my friend Melissa on the PCT south of Lake Tahoe this summer.  I learned a ton about my endurance and my gear doing practice hikes before attempting Oregon.

A great day on the PCT in Oregon.  Water that doesn't need to be filtered - woohoo!


Monday, October 13, 2014

Local Trail - Grimes Point

Fallon is in one of the biggest and flattest valleys in the state, the Lahontan Valley.  People may not realize this but Nevada has the most mountain ranges of any state in the union.  I grew up in Reno, so I'm accustomed to having big mountains (the Sierra Nevadas) right out my doorstep, so to speak, so living in Fallon where it's flat and the mountains are a long ways off, has taken some getting used to. It's also not the greatest place to live if you like to hike and backpack.

However, as an archaeologist, this is one of the coolest places to be in the state.  Fallon is right at the heart of ancient Pleistocene Lake Lahontan, a lake so big that it covered most of Northern Nevada - waxing and waning for about 100,000 years.  The first people in Northern Nevada, estimated to have arrived around 12,000 years ago, would have seen the final remnants of this enormous lake in the form of lakelets and marshes.  Today, we still have a few bits and pieces of the lake left - Pyramid Lake, Honey Lake, and Walker Lake as well as large marshes including the Stillwater Marsh and Carson Lakes near Fallon.  The hills around Fallon bear witness to the ancient lake in the form of shorelines that are clearly visible as "steps" in the hillsides.

Archaeologically, this resulted in a rich history of human use in the valley.  Pretty much all of Nevada is some form of desert - "high desert" in Northern Nevada and "hot desert" in Southern Nevada.  Northern Nevada is also the heart of the Great Basin, a large physiographic region that is characterized by high elevation (3,500 amsl and above), cold winters, hot summers, and low precipitation.  It's called the Great Basin because this is where rivers come to die.  Early Euro-American settlers were amazed to see rivers simply disappearing into "sinks" with no visible body of water like a lake. The Lahontan Valley, where I live, is part of the Carson Sink, which is where the Carson River comes to die - although technically it feeds the Stillwater Marsh and Carson Lakes (which one depends on several hydrologic factors that I'm not going to get into and, not to mention, the Carson River has since been dammed and channelized into irrigation canals but that's a whole other story).

So anyway, the Lahontan Valley is unique in an area characterized by lack of water.  Large marshes and lakelets have occupied the valley since the final high stand of Lake Lahontan around 15,000 years ago.  Marshes are a rich source of resources including edible vegetation, waterfowl, fish, and freshwater mollusks.  Because of this, there has been a long history of human occupation in the Valley, something not seen elsewhere in Northern Nevada.  Most Great Basin prehistoric groups traveled seasonally following resources as they became available.  This was less true in the Lahontan Valley because of the year-round availability of resources.  The groups here might venture out to seek resources not available in the valley (obsidian, large game, pine nuts) but they seem to have mostly stayed put, especially starting in the Late Archaic, which was a period characterized by warmer temperatures and low precipitation.

OK, so why I am explaining all of this on a blog that is supposed to be mostly about hiking?  Grimes Point.  I have very few hiking opportunities in the Lahontan Valley due to its flatness.  I do go out on the Emigrant Trail quite often but it's flat and not very scenic.  It's great for walking long distances but that's about it.  Grimes Point is my other go-to hiking spot because it presents some nice topography for building hiking legs.  It is, however, one of the most important archaeological areas in the state.

Grimes Point is famous for three things - Hidden Cave, Spirit Cave, and the Grimes Point petroglyphs.  Hidden Cave is a "cache" cave that has aided archaeologists in establishing the Great Basin timeline.  It contains stratiphied deposits in dateable contexts that were the basis (along with Monitor Valley finds) for establishing the typology of our most diagnostic artifacts - projectile points.  Spirit Cave is where mummified human remains were found in the 1940s.  The remains have since been radiocarbon dated to 9,500 years ago, the oldest mummified human remains ever found in the United States.  Finally, the Grimes Point petroglyphs are one of the largest collections of their type in Nevada.  So yeah, a lot going on at Grimes Point.

There are several trails at Grimes Point but most of them are interpretive trails.  The Petroglyph Trail is closest to Highway 50 and there is a parking lot, pit toilets, and picnic tables available for visitors.  The Petroglyph Trail is about 0.5 miles long and winds among boulders with petroglyphs.  I recommend walking the trail in both directions because you'll see more if you do that.  The other interpretive trail is down a dirt road from the Grimes Point parking lot.  This trail winds around a hillside showcasing several cave sites including Hidden Cave.  This is a self guided tour and there are usually pamphlets available at the parking area.  There is also a pit toilet available.  These trails are a bit more rugged than the ones on the Petroglyph Trail, so not appropriate for the elderly or handicapped.  Hidden Cave itself is open for tours every other weekend and anyone interested can sign up at the Churchill County Museum on Maine Street in Fallon. Otherwise, Hidden Cave is locked up behind a stout iron door.  It was vandalized this year, the vandals going so far as to get through the door and spray paint over the archaeological deposits.  They still haven't found who did it.

OK, so the trail that I do is not technically an official trail at Grimes Point, although following the vandalization at Hidden Cave, the Bureau of Land Management conceded that the trail was being used and improved it in the hopes that people would at least stay on it and not be tempted to make new ones.  I start at the Petroglyph Trail parking lot and follow the trail up to the Overlook, which is an official trail.  The trail winds up to the Overlook and there is a nice bench and a couple interpretive signs that explain the history of the Lahontan Valley.  You can see Naval Air Station Fallon from here - that's where I work!

From the Overlook, the "unofficial official" trail goes east, climbing up a couple of good grades before reaching the top.  From the parking lot to the top, it's 1,000 ft of elevation gain in about a mile. Some of the climbs are real doozies!  After that, the trail turns north and follows undulating terrain until it drops down toward the Hidden Cave trails.  I follow the trail all the way down to the bottom where there are a couple of nice petroglyphs.  I think I even found a new one this weekend!  Or at least one I'd never seen before. It's amazing how the time of day and even the season can reveal new petroglyphs at the site.  I then turn around and go back the way I came.  It's about 5 miles round trip and takes me about 2 hours, maybe less if I'm hustling.  The trail has some nice views and it's very rocky, so it's a great place to work on your trail legs. Some of the grades are probably in the 30% range, so you'll be working to go up and come down.

Here are some photos of this weekend's trip with Jeff and the dogs:

Jeff and the dogs heading out on the Overlook Trail.  

Winding up the trail to the Overlook.

View north from the Overlook.  
You can clearly see the steps in the hillside from ancient lake shores. 

Heading east up the unofficial trail.

Heading north towards Hidden Cave.

Rocky terrain on the ridge top. 

Petroglyphs on the Hidden Cave side.

This curvilinear style is common at Grimes Point.

This is the new or "new to me" petroglyph I spotted.  
The "rake" design is common in this area.

Picnic Cave, directly across from Hidden Cave.

The trail heading back south. 

Jeff ended up carrying Roxie for a ways.  She was really tired from the heat.  
We decided her trail name is "Bagpipes."

Jeff carrying Roxie aka "Bagpipes" with Dexter aka "Mr. Underfoot" following close behind.

Saturday, October 11, 2014

My Day Pack - Outdoor Products Skyline 8.0

My last post made me think that I need to write a quick gear review of my day pack.  I love my day pack.  I love that it was cheap yet it's been amazingly durable.  I love that it fits great and carries a day's worth of gear effortlessly and feels great on my back.  I love that it thumbs its nose at more expensive brand name packs.  Sometimes you stumble on a cheap-o product that works great and keeps on chugging - this is one of the few items I've bought that has endeared me to it thoroughly in that regard.  You get what you pay for but sometimes you get more than what you paid for.

Outdoor Products Skyline 8.0

Never heard of Outdoor Products?  Think maybe that's a type-o and I meant Outdoor Research?  Well, no, it's not a brand name and it's not a brand that many self respecting, "serious" hikers would consider.  Wal-Mart sells Outdoor Products gear.  As does Big 5 (home of not-quite-household name gear but enough big names to make you think that the off brands are major brands).

The Skyline is a frameless bag with a big (for its size) main compartment, a long narrow front compartment (perfect for maps), two water bottle pockets, two hip belt pockets, and a large hydration sleeve. It also has a side zipper hidden by the left side water bottle holder that you can use to access the main compartment to retrieve small items without going through the top.  It's made of tough ripstop fabric that is lined with waterproofing.  Neither of my backpacking bags have this level of waterproofing.  One of my favorite features is the clip on the left shoulder strap for the hydration tube.  None of my name brand backpacks have this. For fit, it has a pretty respectable hip belt, sternum strap, load lifters, and two side compression straps.  I've carried as much as 15 pounds in it and it supports that kind of load admirably.  I'd imagine you could carry about 20 pounds comfortably with it.  Anything above that and the frameless nature of the bag would be apparent - but who carries that much in a day pack anyway?  I should also say that it's not technically a "frameless" bag -  it does have a single aluminum stay that keeps it from sagging or crumpling.

Even though it does have a lot of nice features for the price, it has many strange features - what I like to call the "WTF??" features of the bag. Features that seem to be there because a "backpack engineer" at Outdoor Products saw some pictures of hiking backpacks and decided to throw some stuff on the bag that look good (I guess) but have no real use.  The #1 weird feature is the stretchy not-quite-net thingy on the top.  I can see no reasonable use for this feature.  If it was bigger and lower on the bag, you could maybe use it to stow rain gear but where it is, it makes no sense whatsoever.  My other favorite non-features are the two gear loops on the bottom of the pack.  What on earth are you going to secure with these things?  Trekking poles?  Maybe, I guess.  Ice axe? Um no.  Finally, are you wondering what the 8.0 in Skyline 8.0 means?  Yeah me too.  Liters?  Kilograms?  No idea.  I guess it just sounds cool. Outdoor Products has other bags with "8.0" in the name so maybe it's the 8th iteration of the backpack.

I've had the bag for about 5 years and it just keeps on trucking with absolutely zero wear.  Originally I bought it to carry my gear for work but it's slowly crept into being my go-to day hiking bag.  Even carrying as much as 15 pounds, I put it on and forget it's there.  The sleek design means my arms have full range of motion and it compresses down and stays put on my back.  I've worn it in some pretty serious rain and it hasn't leaked yet.  I keep waiting for the top zipper to fail but it hasn't.  The Skyline is still available but it's now all black, which I don't find as attractive as my blue and grey model. I'm sorely tempted to order one of Outdoor Products framed backpacking bags for overnight hikes.  The Outdoor Products Stargazer is only $60 at Wal-Mart.


What on earth is this supposed to do?

Gear loops.  Yeah right.

A Nice Little Hike on the Tahoe Rim Trail

Jeff and I took the dogs out for a little hike on the Tahoe Rim Trail last weekend.  The weather is perfect for hiking and the aspens are starting to turn.  We started at the trailhead on the south side of Spooner Summit.  It's a great place to start because of the big parking lot and pit toilet.  Plus the grade isn't too steep and the trail levels out after about 1.5 miles.

This was my inaugural trip wearing a hiking skirt and my new Dirty Girl gaiters and I'm super pleased with both.  I'll be wearing a hiking skirt from now on.  I like that skirts allow for a lot of freedom of movement and keep me feeling cool and comfortable.  As far as the Dirty Girls are concerned - I was a little skeptical that they'd be better than my REI scree gaiters.  But how can hundreds of PCT through hikers be wrong?  Well, they're awesome.  They're so light and comfortable, I forget I have them on - compared to the REI gaiters, which I was conscious of pretty much all the time mainly because of the velcro scratching on my leg constantly.

The day was lovely and the trees, sagebrush, and manzanita smelled wonderful owing to some recent rain and snow.  We hiked about 3 miles in and enjoyed some nice views of the lake before turning back.  Even though it was a Saturday, we only saw a handful of other hikers.  I love getting onto the Tahoe Rim Trail and I'm going to try to get up to Lake Tahoe at least once a week until the snow prohibits any more hikes. I just wish it didn't require a 1.5 hour drive to get there from Fallon.

Me and Jeff.

Me sporting my Marmot Riley skirt and Dirty Girls.  My day pack is a cheap-o Outdoor Products "Skyline 8.0" pack that I paid $25 for at Big 5.  They sell them at Wal Mart too, if that tells you anything.  I love it.  Comfy and plenty roomy for a 3L hydration bag, extra clothes, and snacks. It even has two hip belt pockets.  I've abused the crap out of it and it keeps going. It even withstood a 6 hour downpour on the Oregon Coast without leaking.

Jeff as the intrepid explorer.

Early season snow on the east side of the lake.

Golden aspens way off in the distance.

My new Dirty Girls and trusty Salomons.

Little pine bough looks like a peace sign.

Canine hiking companions.  
Dexter (Australian Kelpie) and Roxie (American Pit Bull Terrier)


Homemade hiking skirt

I've recently been enjoying a hiking skirt that I got on sale from Sierra Trading Post.  It's the Marmot Riley skirt and it totally rocks!  Very lightweight with good coverage.  Unfortunately, I can't find any more Riley skirts online that aren't full price and they retail for $65 - ouch!  I got mine on sale for about $25 with a coupon from STP.

So to save a bit of money and to get precisely the sort of skirt I want, I decided to make my own hiking skirt.  While hiking the PCT in Oregon this summer, my waist got smaller and smaller, making my clothes fit worse and worse as time went on.  So I decided to design my skirt so that it could adapt to a shrinking physique.  I decided to go with a wrap around skirt because you can adjust it as needed to get the right fit.

Before beginning, I had the barest of ideas - mainly that I would make the waist closure with velcro so that I can wrap the skirt as tight or as loose as I'd like. Most wrap around skirts use a tie closure, which would be less adaptable than I had in mind.  I then went online and Googled how to make a wrap around skirt.  The formula that I found was pretty easy and ideal for what I had in mind.  The easiest way to make a skirt is to make a tube with some sort of waistband.  The problem with this is that the profiles of the skirt will be straight sided, which is not very flattering and could inhibit movement.  The formula I found makes for a slightly more fitted, A-line profile, which was much closer to what I had in mind.

Basically, the skirt is made from three trapezoidal panels that are sewn together and hemmed. The measurements below don't account for seam allowances, so remember to add for that.  This is how you do it (measurements in inches):

1) Skirt top (waist) - measure your waist and multiply by 50%:    30(1.5) = 45
2) Skirt bottom - take the result of Step 1 and multiply times 30% :   45 (1.3) =  58.5
3) Length - whatever length you want just remember to account for seam allowances and hemming.
4) Make a newspaper pattern using the above measurements.  The easiest way to make the pattern is to halve the waist and bottom measurements, fold a piece of newspaper in half and measure out from the fold.  That way your only cutting the edges once and you will make a pattern that is exactly identical on all sides.


5) Pick fabric for the skirt.  I wanted a lightweight synthetic for my skirt.  I looked through the polyester section of the fabric store and found exactly what I was looking for but unfortunately (or not, I kinda like it) the fabric I had in mind was only available in camouflage colors.  But camo is available in a wide variety of colors these days and I found a color and pattern I liked pretty well.  I purchased one yard of 60" wide fabric and some 1.5" velcro for the closure, all of which cost about $6.50.  I have a lot of thread at home, so I didn't need to add that to my expenses.  There was a small problem with only buying one yard but I'll get to that.  In the end, it turned out to be the perfect amount of fabric.

6) Begin cutting the fabric.  Technically, if you do this right, you will want three full panels cut to the above pattern.  I kinda screwed up by buying only one yard of fabric so I ended up cutting two full panels and two half panels - with the square of fabric I bought, that was the only way to get all of the pieces cut.  There are two minor problems with the way I cut my pieces:  1) you have to sew one extra seam because of the two half panels and 2) the fabric pattern for the two half panels won't run in the same direction as the rest of the skirt.  In the end, I don't mind the way it looks at all.  If you use a solid, obviously this won't be a problem. You also won't have this problem if you buy a longer length of fabric - say 1.5 yards instead of the 1 yard I bought.  BUT, I used the single yard thoroughly and there was very little wastage with enough fabric left over to add a couple of side pockets if I want.

7) Sew the panels together.  You could just do a regular flat seam for this but I went all fancy and sewed a "flat felled seam," which I am not going to explain how to do but here's a video.  Needless to say, it's the double seam you typically see on the sides of blue jeans.  It's stronger than a normal seam and is ideal for outdoor wear.  It's also a pain in the neck to do with a regular sewing machine because if you don't get your stitches exactly parallel, it looks like crap. Mine look OK - more like do-do than crap. :)

8) Hem the bottom and waist.  Hoy!  This took forever because the hems and waists of wrap around skirts are half again as wide as a regular skirt.

9) Add velcro to the waist for securing the skirt.  I had to play around a bit with this to get the velcro positioned correctly.  I put the "soft" side of the velcro on the inside of the skirt so that that the "grabby" side wouldn't rub against my skin.  Now that I've finished the skirt, I would probably do it the other way around.  I sewed on a really long length of velcro so the skirt would have the adaptability I was looking for.  Currently, there is a 4" length of velcro that isn't covered up when I wrap the skirt around my waist.  The "grabby" velcro sticks to everything including my hiking shirt, which will damage my shirt.  If I put the "soft" side out, I won't have this problem. I also added a short length of velcro near the back of the skirt to secure the inside panel so it doesn't droop. More experimentation needed here, obviously.

10) Tada!  One homemade, lightweight, adaptable hiking skirt:

Notice how the pattern of the front panel is vertical instead of horizontal like the rest of the skirt.
This is the result of cutting two half panels.  I think it looks just fine. The other half panel is hidden.


I think it turned out OK.  I'm going to make another one but longer.  This one turned out a little too short for my tastes.  It's OK standing up but it rides up really high when I sit down.  The finished skirt weighs 7.5 oz.  It took me about 4 hours to make.  So for about $6.50 and 4 hours of my time, I have a perfectly useable hiking skirt.